


🎉Steel Reinforced Epoxy Repair Putty for Metal Wood Concrete and PVC❄️
🎉Steel Reinforced Epoxy Repair Putty for Metal Wood Concrete and PVC❄️
Couldn't load pickup availability

🎉Steel Reinforced Epoxy Repair Putty for Metal Wood Concrete and PVC❄️
A Simple Way To Repair Cracks, Leaks & Broken Surfaces
Mold it by hand, press it into the damaged area, and let it cure into a hard repair. A practical solution for everyday fixes around the home, garage and workshop.
Creates A Weld-Like Bond Without Welding Tools
Tape can peel away, liquid glue can run, and soft fillers may struggle when the damaged area needs more support. This two-part repair putty bonds directly to the surface and cures into a tough, solid repair.
Waterproof Sealing For Pipes, Leaks & Damp Repair Areas
Moisture can quickly turn a small crack into a bigger problem. Once fully cured, this repair putty is designed to resist water, making it useful for many pipe joints, small holes and damp household repair areas.
Shapes By Hand To Fit Cracks, Holes & Uneven Breaks
Curved pipes, chipped corners and irregular gaps can be difficult to cover with flat tape or runny adhesive. The putty can be pinched, kneaded, pressed and molded directly into the damaged area.
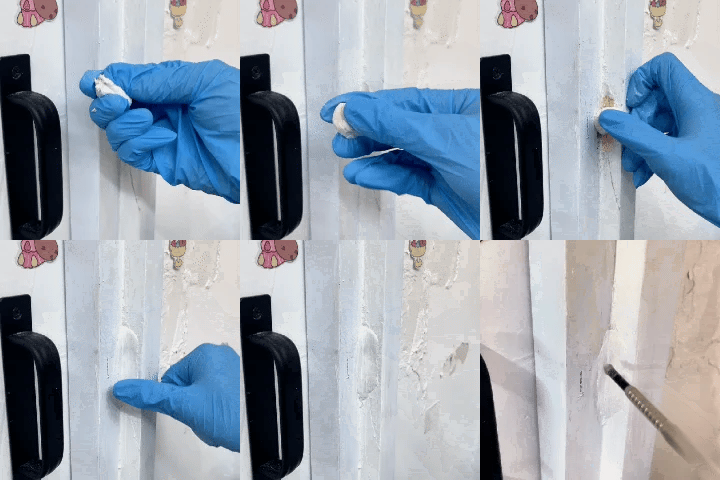
Hardens Into A Durable Repair That Resists Cracking
Some fillers remain soft, shrink or crumble after drying. Once fully cured, this repair putty forms a firm, hardened finish designed to stay in place and reinforce the repaired area.
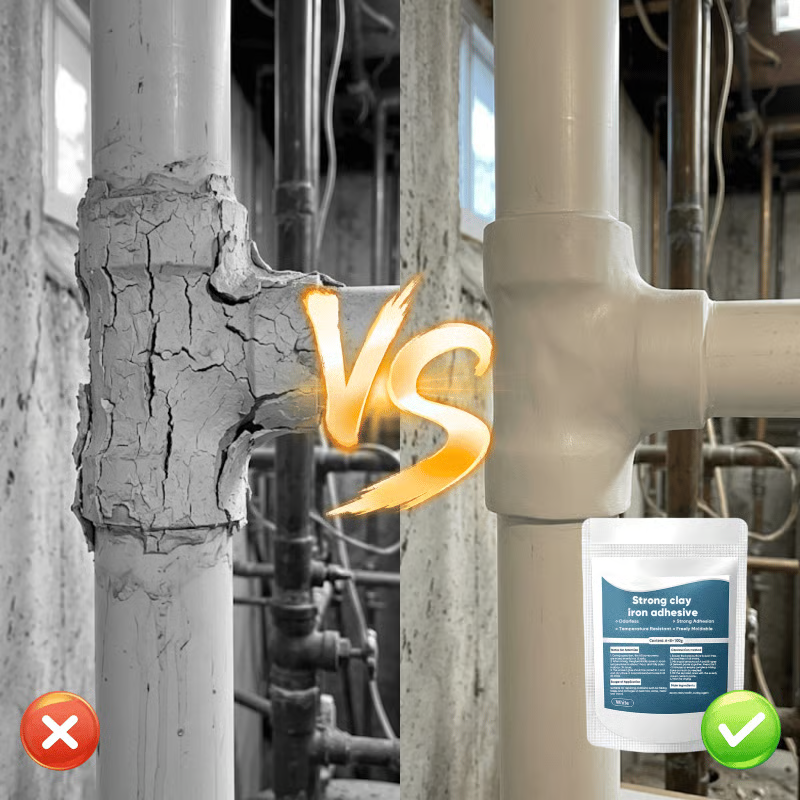
Simple One-Person Mix, Knead & Press Application
No welding setup or complicated repair equipment is required. Simply take equal amounts of Part A and Part B, knead them together, press the mixed putty onto the damaged area and shape it before curing.
Works Across Multiple Everyday Repair Scenarios
Instead of keeping a different adhesive for every small job, keep one moldable repair putty ready for common repairs around the home, garage, utility room and workshop.
How To Use It In A Few Simple Steps
Prepare the surface properly, mix equal amounts of the two components and shape the putty before it begins to harden.
Clean The Surface
Remove dust, grease, loose material and moisture from the damaged area.
Take Equal Parts A + B
Use approximately equal amounts of the two putty components.
Knead For 1–3 Minutes
Mix the two components thoroughly until the putty is evenly blended.
Press, Shape & Allow To Cure
Press the putty firmly into the damaged area and shape it as needed. Initial curing takes about 1 hour. Allow approximately 24 hours for a full cure.
Frequently Asked Questions
Common questions before you get started.
What materials can I use it on?
It is designed for many common repair surfaces including metal, PVC and plastic, ceramic, tile and wood. Clean and prepare the surface before application for best contact.
Can it be used around leaking pipes?
Yes. Once fully cured, the putty is designed to resist moisture and can be used for many small pipe, fitting and leak-repair applications. Apply it to a clean surface and make the repair area as dry as possible during application.
Do I need welding tools or special equipment?
No welding equipment is required. Measure equal amounts of Part A and Part B, knead them together, then press and shape the mixed putty directly onto the repair area.
How long does it take to cure?
Initial curing takes approximately 1 hour. Allow about 24 hours for a complete cure before placing the repaired area under normal stress.
Can it fill irregular cracks and holes?
Yes. Because the putty is moldable before curing, it can be pressed into curved areas, gaps, holes, corners and other irregular shapes.
Does it stay soft after curing?
No. When Part A and Part B are properly mixed and fully cured, the material hardens into a firm repair rather than remaining soft like a flexible filler.
Can I shape it before it hardens?
Yes. Shape, press and smooth the putty immediately after mixing and application. Once it has fully cured, it becomes much harder to reshape.
How should I prepare the damaged surface?
Remove dirt, grease, dust, loose rust and other debris. The cleaner the repair area is, the better contact the putty can make with the surface.


